
DuckLake brings lakehouse capabilities to DuckDB, providing ACID transactions and time travel on your data lake. SQLMesh adds sophisticated transformation management with incremental processing. Together, they create a powerful, open source lakehouse for the post-modern data era.
Building an Open Lakehouse with DuckLake and SQLMesh: A Practical Guide
In this tutorial, we’ll create a small data lakehouse on your laptop, ingesting a CSV of e-commerce events and producing a daily revenue report using DuckLake’s ACID-compliant table format and SQLMesh’s incremental pipeline.
Part 1: The Stack
In the post-modern data stack, separating storage, metadata, and compute is essential for flexibility and scalability. This architecture enables you to leverage best-in-class open-source components.
What is an Open Table Format?
A data lake (like S3 or local storage) is excellent at storing raw files but lacks organization, transaction support, and schema enforcement. An Open Table Format (like DuckLake, Apache Iceberg, or Delta Lake) sits on top of the data file format (Parquet) and organizes the files as a table. It defines how data files are organized and provides a metadata layer that tracks which files belong to which table version, enabling critical data warehouse-like functionality.
The Table Format - Ducklake
DuckLake is an open table format. It is not a storage system. Instead, it organizes data stored in Parquet files on your object storage and maintains metadata. DuckLake acts like a metadata catalog for your object storage.
As a result, DuckLake provides:
- ACID Transactions: Ensures data integrity during writes.
- Time Travel: Allows querying historical versions of a table.
- Schema Enforcement: Ensures data adheres to the defined structure.
The Compute and State Storage - DuckDB
DuckDB is a fast, in-process analytical database engine. In this stack, DuckDB serves as the compute engine. It reads the DuckLake metadata, understands the table structure, and executes the SQL queries against the underlying Parquet files.
The Transformation & Orchestration Layer - SQLMesh
SQLMesh is a next-generation data transformation framework. It serves as the orchestration and transformation layer. SQLMesh defines the data pipeline logic, manages model dependencies, and ensures data correctness through features like audits, tests, state management, and Virtual Data Environments.
How They Work Together
In this scenario, SQLMesh defines the transformation logic and orchestrates the pipeline. SQLMesh stores project metadata and state information in DuckDB. SQLMesh instructs DuckDB (the compute engine) to execute the transformations. DuckDB reads and writes data to your object storage (local Parquet files in this case), organized using the DuckLake table format (the metadata layer).
- Storage Layer (Object Storage): This is where your actual data lives (e.g., a local directory or an S3 bucket). Data is stored here as local Apache Parquet files.
- Metadata Layer (DuckLake Table Format): DuckLake organizes the storage layer. It uses a Catalog Database (which can be a DuckDB file, PostgreSQL, or MySQL) to store metadata, like schemas, table versions, and pointers to the Parquet files in the storage layer.
- Compute Layer (DuckDB): The engine that performs the actual data processing. It reads the DuckLake metadata to locate the correct Parquet files and executes the queries.
- Orchestration Layer (SQLMesh): Manages the pipeline logic and execution sequence using cron.
- SQLMesh State Management (Separate State DuckDB Database): SQLMesh needs to track its own execution state (which models have run, time intervals processed, etc.). This requires frequent UPDATE operations. To maintain efficiency, we configure a separate database (e.g., another local DuckDB file) specifically for SQLMesh's internal state, separate from the DuckLake catalog.
Note - DuckLake tables do not currently support UPDATE statements so SQLMesh cannot store its state in a DuckLake-managed table. The state database (data/sqlmesh_state.db) is a regular DuckDB database used by SQLMesh for tracking job state, while catalog.ducklake is a DuckLake-format database used only for the data's metadata. This separation improves efficiency (avoids contention with frequent state updates) but is functionally necessary given DuckLake’s current design.
Prerequisites and Environment Setup
Ensure you have Python 3.8 or higher installed.
Create Your Project Structure
Let's set up a standard SQLMesh project directory.
mkdir ducklake-sqlmesh-tutorial
cd ducklake-sqlmesh-tutorial
Set Up a Python Virtual Environment
Isolate your project dependencies.
python3 -m venv .venv

source .venv/bin/activate  # On macOS/Linux

.venv/Scripts/activate  # On Windows
Install Required Packages
Install SQLMesh with DuckDB support. The DuckLake extension is included in recent DuckDB versions.
pip install 'sqlmesh[lsp,duckdb]'
Download the VS Code Extension, Initialize the SQLMesh Project
Download the official SQLMesh VS Code extension from the Extensions: Marketplace
Select your Python interpreter (you may need to use “Ctrl + P” or “Ctrl + Shift + P” to access the developer menu in VS Code):

Reload your windows:

Initialize the SQLMesh Project and build the project scaffolding. In your terminal:
sqlmesh init
──────────────────────────────Welcome to SQLMesh!──────────────────────────────
What type of project do you want to set up?
[1] DEFAULT - Create SQLMesh example project models and files
[2] dbt - You have an existing dbt project and want to run it with SQLMesh
[3] EMPTY - Create a SQLMesh configuration file and project directories only
Enter a number: 3
──────────────────────────────
Choose your SQL engine:
[1] DuckDB
[2] Snowflake
[3] Databricks
[4] BigQuery
[5] MotherDuck
[6] ClickHouse
[7] Redshift
[8] Spark
[9] Trino
[10] Azure SQL
[11] MSSQL
[12] Postgres
[13] GCP Postgres
[14] MySQL
[15] Athena
[16] RisingWave
Enter a number: 1
──────────────────────────────
Choose your SQLMesh CLI experience:
[1] DEFAULT - See and control every detail
[2] FLOW - Automatically run changes and show summary output
Enter a number: 1
──────────────────────────────
Your SQLMesh project is ready!Add a data/storage folder to the project. This will hold the Parquet files as well as the DuckLake metadata and SQLMesh State databases.
mkdir -p data/storage #mac/linux
md data\storage #Windows PowerShell
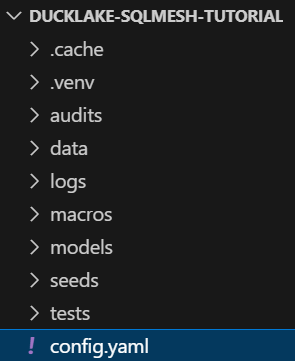
You should see your SQLMesh project scaffolded in your File Explorer window:
Configure the Project
We will use DuckDB as the engine (and state database) and define how DuckDB should interact with the DuckLake table format.
Create a file named config.yaml in your project root:
# Define the connections
gateways:
  local_gateway:
    connection:
      # DuckDB is the compute engine
      type: duckdb

      # Define how DuckDB interacts with the storage and format
      catalogs:
        # The name we will use to reference this database
        my_lakehouse:
          # Specify the table format
          type: ducklake

          # Metadata Path (The Catalog Database): Where DuckLake stores table versions.
          # In this local example, we use a DuckDB file for the catalog.
          path: data/catalog.ducklake

          # Data Path (The Object Storage): Where the actual Parquet files are stored.
          data_path: data/storage/

      # Ensure the ducklake extension is automatically loaded by DuckDB
      extensions:
        - ducklake
    state_connection:
      # State connection for SQLMesh to track model states
      type: duckdb
      database: 'data/sqlmesh_state.db'
# Set the default gateway
default_gateway: local_gateway

# Default settings for models
model_defaults:
  dialect: duckdb
  start: '2024-01-01'
Understanding the Configuration
connection.type: duckdb: Sets DuckDB as the compute engine.catalogs.my_lakehouse: Defines a database connection named my_lakehouse.type: ducklake: Tells the DuckDB engine to use the DuckLake table format for this connection.path: The location of the DuckLake Catalog Database (metadata storage).data_path: The location of the Object Storage (Parquet file storage).
state_connection: A separate DuckDB file dedicated to tracking SQLMesh's internal execution state.
Install DuckLake
We attach the DuckLake catalog to specify where metadata will be stored and link it to our data directory. This registers the data_path in the DuckLake metastore, so DuckDB knows where to write Parquet files.
#log into duckdb cli
duckdb data/storage/sqlmesh_state.db
#install ducklake
INSTALL ducklake;
#attach ducklake to the db
ATTACH 'ducklake:data/catalog.ducklake' AS my_ducklake (DATA_PATH 'data/storage/');
USE my_ducklake;
#exit duckdb
.exitTest your configuration. If there are no errors, then you are good to go!
sqlmesh migrate
Building the Pipeline
Now that our environment is ready, let’s set up a simple pipeline. We’ll use a small CSV of raw e-commerce events as our source data, then create a staging view to clean the data, and finally an incremental model to aggregate daily revenue.
Sample Data
Create seeds/raw_events.csv:
event_id,user_id,event_type,event_timestamp,revenue
1,101,page_view,2024-01-01 10:00:00,0
2,101,purchase,2024-01-01 10:10:00,29.99
3,102,page_view,2024-01-01 11:00:00,0
4,103,page_view,2024-01-02 09:00:00,0
5,103,purchase,2024-01-02 09:08:00,29.99
Define the Seed Model
A SEED model tells SQLMesh how to load the CSV data.
Create models/raw_events.sql:
MODEL (
    name raw.events,
    kind SEED (
        path '../seeds/raw_events.csv'
    ),
    columns (
        event_id INT,
        user_id INT,
        event_type TEXT,
        event_timestamp TIMESTAMP,
        revenue DECIMAL(10,2)
    )
);
Define the Staging Model
A staging model cleans and standardizes the raw data.
Create models/stg_events.sql:
MODEL (
    name staging.stg_events,
    kind VIEW
);

SELECT
    event_id,
    user_id,
    event_type,
    event_timestamp,
    -- Extract date for incremental processing
    DATE(event_timestamp) as event_date,
    revenue
FROM
    raw.events
WHERE
    event_id IS NOT NULL;
Define the Incremental Model
This model aggregates data into a daily summary. We use INCREMENTAL_BY_TIME_RANGE so that SQLMesh only processes new days as they arrive.
Create models/daily_revenue.sql:
MODEL (
    name analytics.daily_revenue,
    kind INCREMENTAL_BY_TIME_RANGE (
        time_column event_date,
        lookback 2,
        partition_by_time_column TRUE
    ),
    start '2024-01-01',
    cron '@daily',
    allow_partials TRUE,
    interval_unit 'day',
    grain event_date
);

SELECT
    event_date,
    COUNT(DISTINCT user_id) as unique_users,
    COALESCE(SUM(CASE WHEN event_type = 'purchase' THEN revenue END), 0) as total_revenue
FROM
    staging.stg_events
WHERE
    event_date >= @start_ds
    AND event_date < @end_ds
GROUP BY
    event_date;
Note: In our analytics.daily_revenue model, the INCREMENTAL_BY_TIME_RANGE config handles what data to recompute (new daily partitions, with a 2-day lookback), while partition_by_time_column=TRUE controls how the output is stored on disk (one folder per event_date). Incremental processing is about efficiency in recomputation, and partitioning is about efficient data layout.
The SQL Query Explained
The SQL query defines the business logic for the transformation:
SELECT
    event_date,
    COUNT(DISTINCT user_id) as unique_users,
    COALESCE(SUM(CASE WHEN event_type = 'purchase' THEN revenue END), 0) as total_revenue
FROM
    staging.stg_events
WHERE
    event_date >= @start_ds
    AND event_date < @end_ds
GROUP BY
    event_date;
The most critical part of this query for an incremental model is the WHERE clause:
WHERE event_date >= @start_ds AND event_date < @end_ds: This is where the magic of incremental processing happens.@start_dsand@end_dsare special macros that SQLMesh automatically replaces with the start and end dates of the specific interval it is processing.- For example, when the daily cron job runs on the morning of January 4th to process data for January 3rd, SQLMesh will render the query with
WHERE event_date >= '2024-01-03' AND event_date < '2024-01-04'. - This ensures that on each run, the query only scans and computes data for a single day from the upstream
staging.stg_eventsmodel, making the process incredibly fast and cost-effective.
- For example, when the daily cron job runs on the morning of January 4th to process data for January 3rd, SQLMesh will render the query with
Putting It All Together
Here’s how it all works together:
- Scheduled Run: The
@dailycron schedule triggers a run. - Interval Calculation: SQLMesh determines the next interval to process (e.g.,
2024-01-03). It also considers the lookback of2, adding the previous two days (2024-01-01, 2024-01-02) to the processing plan to account for late data. - Query Execution: For each of these daily intervals, SQLMesh executes your SQL query, substituting
@start_dsand@end_dswith the correct dates. - Efficient Deletes and Inserts: For the intervals being reprocessed (the lookback), SQLMesh first runs a
DELETEstatement on the target table for those specific dates. It then runs anINSERTstatement to load the newly computed data for all processed intervals. - Partitioned Writes: Because we've specified
partition_by_time_column, the newly inserted data is written to the correct physical directory on disk (e.g.,.../event_date=2024-01-03/), keeping your data lake organized and fast to query.
Using the LINEAGE tab, powered by the SQLMesh VS Code extension, you can see the project’s column-level lineage.

Running and Verifying the Pipeline
Plan/Apply the Changes
Run the plan command. SQLMesh compares the current state to the desired state defined by your models.
sqlmesh plan dev

`dev` environment will be initialized

Models:
└── Added:
    ├── analytics__dev.daily_revenue
    ├── raw__dev.events
    └── staging__dev.stg_events
Models needing backfill:
├── analytics__dev.daily_revenue: [2024-01-01 - 2025-08-05]
├── raw__dev.events: [full refresh]
└── staging__dev.stg_events: [recreate view]
Apply - Backfill Tables [y/n]: y

Updating physical layer ━━━━━━━━━━━━━━━━━━━━━━━━━━━━━━━━━━━━━━━━ 100.0% • 3/3 • 0:00:00

✔ Physical layer updated

[1/1] raw__dev.events                [insert seed file]                 0.01s
[1/1] staging__dev.stg_events        [recreate view]                    0.04s
[1/1] analytics__dev.daily_revenue   [insert 2024-01-01 - 2025-08-05]   0.04s
Executing model batches ━━━━━━━━━━━━━━━━━━━━━━━━━━━━━━━━━━━━━━━━ 100.0% • 3/3 • 0:00:00

✔ Model batches executed

Updating virtual layer  ━━━━━━━━━━━━━━━━━━━━━━━━━━━━━━━━━━━━━━━━ 100.0% • 3/3 • 0:00:00

✔ Virtual layer updated
SQLMesh will identify that all models need to be created and backfilled for the time range present in the data.
Type y and press Enter to apply the plan.
What Exactly Happened?
- SQLMesh initialized its tracking database (
data/sqlmesh_state.db) and recorded the new models. - DuckDB (the compute engine) created the physical tables for our models.
- DuckDB, using DuckLake, created a catalog file (
data/catalog.ducklake) to store table metadata (versions, schemas). - DuckDB wrote the raw and transformed data as Parquet files in
data/storage/, partitioned by date. - DuckLake’s metadata was updated to point to all the new Parquet files that form the current table versions.
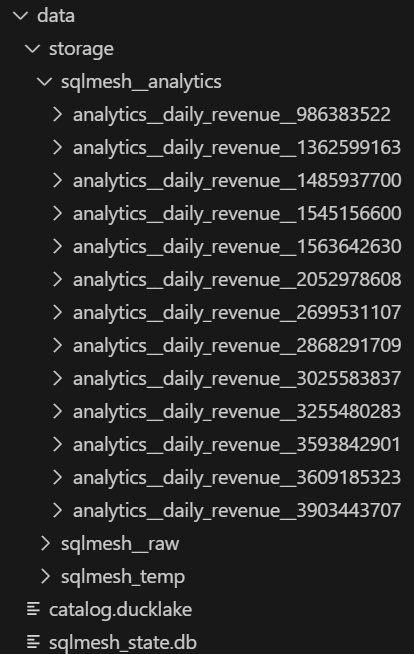
If you explore the data/storage/ directory, you will now see the actual data stored as Parquet files, organized by the DuckLake format.
Verify the Data
You can verify the results using SQLMesh's fetchdf command.
Notice the model names like raw__dev.events, SQLMesh automatically creates a dev version of each model (with a __dev suffix) in our DuckLake catalog. This is part of SQLMesh’s Virtual Data Environments feature: the dev environment data is isolated from prod.
sqlmesh fetchdf "SELECT * FROM analytics__dev.daily_revenue ORDER BY event_date"
You will see the following output:
  event_date  unique_users  total_revenue
0  2024-01-01             2          29.99
1  2024-01-02             1          29.99
Load the Data Into Prod
Follow the same process to do the initial Plan/Apply for the prod environment:
sqlmesh plan
Apply - Backfill Tables [y/n]: Y
Notice that only the virtual layer was updated when you promoted the project to prod. The physical changes are executed in the development environments. When updates are promoted to production, the production view modifies it’s pointer to point to the most recent physical table, which was generated during sqlmesh plan dev. This virtual data environment development process enables seamless deployment across environments because only the underlying table pointer is updated, keeping the production table view name unchanged. Downstream users will have uninterrupted access when production views are updated to the most recently physical table.
Incremental Processing
State management is a strength of SQLMesh. Understanding e enables SQLMesh to process incremental models efficiently by only processing new data, and prevent data leakage by capturing late-arriving rows.
Add New Data
Append the following lines to seeds/raw_events.csv. This adds data for two new days. Change the dates to correspond with 2 days before the UTC day that you are running this tutorial so that the data is captured in the incremental model lookback.
6,104,page_view,2025-08-05 14:00:00,0
7,104,purchase,2025-08-06 14:15:00,49.99
Rerun the Pipeline
Run the plan again to add any changes to our dev environment.
sqlmesh plan dev

Differences from the `dev` environment:

Models:
├── Directly Modified:
│   └── raw__dev.events
└── Indirectly Modified:
    ├── staging__dev.stg_events
    └── analytics__dev.daily_revenue
Models needing backfill:
├── analytics__dev.daily_revenue: [2024-01-01 - 2025-08-05]
├── raw__dev.events: [full refresh]
└── staging__dev.stg_events: [recreate view]
Apply - Backfill Tables [y/n]: y

Updating physical layer ━━━━━━━━━━━━━━━━━━━━━━━━━━━━━━━━━━━━━━━━ 100.0% • 3/3 • 0:00:00

✔ Physical layer updated

[1/1] raw__dev.events                [insert seed file]                 0.01s
[1/1] staging__dev.stg_events        [recreate view]                    0.05s
[1/1] analytics__dev.daily_revenue   [insert 2024-01-01 - 2025-08-05]   0.04s
Executing model batches ━━━━━━━━━━━━━━━━━━━━━━━━━━━━━━━━━━━━━━━━ 100.0% • 3/3 • 0:00:00

✔ Model batches executed

Updating virtual layer  ━━━━━━━━━━━━━━━━━━━━━━━━━━━━━━━━━━━━━━━━ 100.0% • 3/3 • 0:00:00

✔ Virtual layer updated
We can clearly see how dev has two extra rows that prod doesn’t (the new dates) by using SQLMesh’s table_diff feature:
sqlmesh table_diff prod:dev analytics.daily_revenue --show-sample

Models to compare:
└── analytics.daily_revenue

Calculating model differences ━━━━━━━━━━━━━━━━━━━━━━━━━━━━━━━━━━━━━━━━ 100.0% • 1/1 • 0:00:00


Table diff completed successfully!


Table Diff
├── Model:
│   └── analytics.daily_revenue
├── Environment:
│   ├── Source: prod
│   └── Target: dev
├── Tables:
│   ├── Source: my_lakehouse.analytics.daily_revenue
│   └── Target: my_lakehouse.analytics__dev.daily_revenue
└── Join On:
    └── event_date

Schema Diff Between 'PROD' and 'DEV' environments for model 'analytics.daily_revenue':
└── Schemas match


Row Counts:
├──  FULL MATCH: 2 rows (66.67%)
└──  DEV ONLY: 2 rows (33.33%)

COMMON ROWS column comparison stats:
               pct_match
unique_users       100.0
total_revenue      100.0


COMMON ROWS sample data differences:
  All joined rows match

DEV ONLY sample rows:
event_date  unique_users  total_revenue
2025-08-05             1           0.00
2025-08-06             1          49.99
SQLMesh compared the data across the prod and dev environments for the analytics.daily_revenue table. The diff shows 2 rows exist only in dev (33% of rows), corresponding to the new dates we added, while all other rows match 100%. This confirms that prod hasn’t processed the new data yet.
Let’s run our incremental model in prod to capture the new data. We use sqlmesh run --ignore-cron to force an immediate run of the incremental model in prod, rather than waiting for the cron schedule. This processes the new data for the latest dates right now.
sqlmesh run --ignore-cron
[1/1] analytics.daily_revenue   [insert 2025-08-05 - 2025-08-07]   0.15s
Executing model batches ━━━━━━━━━━━━━━━━━━━━━━━━━━━━━━━━━━━━━━━━ 100.0% • 1/1 • 0:00:00

✔ Model batches executed

Run finished for environment 'prod'
Our model processed the new data for today (August 7, 2025 as of this writing), and the 2 day lookback.
Let’s promote any changes that we made to the project in dev to our prod environment.
sqlmesh plan

Differences from the `prod` environment:

Models:
├── Directly Modified:
│   └── raw.events
└── Indirectly Modified:
    ├── analytics.daily_revenue
    └── staging.stg_events
Apply - Virtual Update [y/n]: y

SKIP: No physical layer updates to perform

SKIP: No model batches to execute

Updating virtual layer  ━━━━━━━━━━━━━━━━━━━━━━━━━━━━━━━━━━━━━━━━ 100.0% • 3/3 • 0:00:00

✔ Virtual layer updated
SQLMesh detects the change in the seed file. When you apply the plan, SQLMesh efficiently updates the raw.events table and then processes the analytics.daily_revenue model only for the affected time intervals. DuckDB writes only the new data to storage, and DuckLake efficiently updates the metadata, avoiding a full reprocessing of the dataset.
Now, with our newly arrived data processed in both environments, our models should match:
sqlmesh table_diff prod:dev analytics.daily_revenue
No models contain differences with the selection criteria: 'analytics.daily_revenue'
Our prod environment shows the latest version of the analytics.daily_revenue table.
Conclusion
You have successfully built a modern, open data lakehouse by separating compute (DuckDB), storage (local directory), metadata (DuckLake table format), and orchestration (SQLMesh). Thanks to DuckLake’s ACID guarantees and metadata management, we were able to handle data increments and schema enforcement seamlessly which would be veryhard to DIY on raw Parquet files, especially at scale.
This foundation enables you to build data transformation pipelines that scale efficiently. While DuckLake is new, it continues to evolve. On their roadmap are exciting new features like Apache Iceberg compatibility, which will continue to make it a game-changing technology. The future is exciting!
{{banner-slack}}


